MEIC/MERC 2014/2015
Mobile Computing
Week 12
Project Implementation
Objectives:
- Project implementation.
1. Termite: New Release
A new version of Termite as been released (version 20150503). It includes the following additional features:
- Connectors for two new Virtual Machine backends: Genymotion, and RNL's CloudStack cluster.
- Command for launching applications from the Termite console.
- Shortened emulator identifiers for faster typing.
- Scripting support.
The new Termite version is distributed in three independent packages:
- Termite-Cli-20150503.tgz: A binary distribution of the Termite client tool.
- Termite-WifiP2P-API-20150503.tgz: The source code (and binary) of Termite WiFi Direct API.
- Termite-WifiP2P-SimpleChat-20150503.tgz: The SimpleChat demo application.
2. General setup
1. Download the termite client and the demo application: Create a local directory. Download the termite client and the SimpleChat project, and decompress both packages onto that directory. Explore both projects and check out the differences when compared with the first distribution (see Lab Guide 5).
2. Build the demo app: Import the project Termite-WifiP2P-SimpleChat/TermiteCMov into Android Studio. It has been configured to include the Termite API library. Build the project.
3. Set up some environment variables for termite: Open a console, change directory to the termite cli folder. Set the environment variable TERMITE_CLI_PATH to the path of the Termite CLI tool. Set up a second environment variable TERMITE_PLATFORM with the name of the local OS: mac, linux, or windows. The script env_setup.[sh|bat] under Termite-Cli/etc/platform/[mac|linux|windows] provide a template of the commands to be executed on the console.
3. Using the AVD connector
1. Configure Termite: First, you need to update some configuration files of Termite. Open the file etc/platform/backends.conf located under etc/platform/[mac|linux|windows]:
-
Update the
sdkattribute with the correct Android SDK path. A simple way to determine this is by opening the TermiteCMov project settings on Android Studio. On Windows, you must write the sdk path as in, e.g.,"c:\\my\\path\\for\\sdk". -
Update the
vmiattribute with a valid Android Virtual Device (AVD) name. Termite will use this name to launch emulator instances using that specific AVD image. To determine which AVDs are available locally, go to the Android SDK directory and under thetoolssubdirectory execute the command./android list avd, and choose the AVD image name you want to be able to launch from termite.
Open file applications.conf. Make sure that the "rpath" attribute points to the relative location of your application package, starting from the parent directory of $TERMITE_CLI_PATH. Since the SimpleChat project and the Termite Cli tool were decompressed in the same directory, you don't need to change anything in this configuration file.
2. Run the termite tool: On mac or linux, run the script ./termite.sh. On windows, execute the batch file termite.bat. If everything went well, the following output is expected:
  Termite Testbed
  Working Directory = /Users/nsantos/Desktop/CMovWeek12/Termite-Cli
  Type "help" or "h" for the full command list

avd:simplechat>
3. Launch two emulators: On Termite, create two new emulator instances by executing the command deployemulator. To make sure that the emulators boot properly, wait until the first emulator finishes bootstrapping before launching the second one. If you are experiencing problems (e.g., the emulator hangs), go to Android Studio, open the AVD manager and wipe the data of the respective AVD image. Also, make sure that the emulator memory does not exceede 512MB. You can list the state of existing emulators with command list. Here's a possible output of this operation:
avd:simplechat> deployemulator
avd:simplechat> deployemulator
avd:simplechat> list emus
e1 => online
    name: emulator-5554
e2 => online
    name: emulator-5556
4. Configure the network addresses of the emulators: In order for Termite to communicate with the emulators and emulators with each other, it is necessary to perform some port redirection operations. The Termite tool can help in this task. First, you need to assign network addresses to each emulator individually using the assignaddresses as follows:
avd:simplechat> assignaddr e1
avd:simplechat> assignaddr e2
avd:simplechat> list emus
e1 => netok
    name: emulator-5554
    addr: [ avaddr = 192.168.0.1:10001, araddr = 10.0.2.2:10011, cvaddr = 127.0.0.1:9001, craddr = 127.0.0.1:9011]
e2 => netok
    name: emulator-5556
    addr: [ avaddr = 192.168.0.2:10001, araddr = 10.0.2.2:10021, cvaddr = 127.0.0.1:9001, craddr = 127.0.0.1:9021]
From this listing, what is important to understand now is the "avaddr" attribute which means: application virtual address. Essentially these are the virtual addresses that Termite will emulate for the application running on that particular emulator. For example, for e1, the virtual IP address seen by the application is 192.168.0.1, and the port number where the application will be listening is 10001. The SimpleChat application will be listening for connections on this port. These addresses are specified in the termite configuration file etc/netprofiles.conf.
Next, it is necessary to bind the names of the virtual devices A and B to each of the emulators. This is done using the binddevice command as illustrated next:
avd:simplechat> binddevice A e1
avd:simplechat> binddevice B e2
avd:simplechat> list devices
A 192.168.0.1:10001 10.0.2.2:10011  127.0.0.1:9011
B 192.168.0.2:10001 10.0.2.2:10021  127.0.0.1:9021
The list devices command provides details of your virtual network. In the network emulation, these are the names to be used when referring to the virtual nodes, not emulator names. We are now ready to deploy the application and emulate the network.
5. Launch the application: From Android Studio, select the SimpleChat module, and deploy the application, first on emulator-5554 (e1) and then on emulator-5556 (e2). Alternatively, launch the application on the console by executing the sequence of commands: launchapp e1 and launchapp e2. To verify that the nodes are online, execute the ping command:
avd:simplechat> ping
A 127.0.0.1 9011  ONLINE
B 127.0.0.1 9021  ONLINE
This means that the termite service is waiting on ports 9011 and 9021 of the localhost. These ports are internally redirected to the port 9001 inside the emulator.
6. Emulate node movement: On the each node, hit the "Wifi On" button in the SimpleChat's main activity to start the Termite WiFi service. Then, to emulate nodes A and B forming a group, on the console, move A close to node B as shown next (make sure that you can see both the emulators when you execute the following commands):
avd:simplechat> move A (B)
avd:simplechat> list n
A => B
B => A
avd:simplechat> creategroup A (B)
avd:simplechat> list groups
A => B
avd:simplechat> commit
B 127.0.0.1 9021  SUCCESS
A 127.0.0.1 9011  SUCCESS
Observe toasts reading "Network membership changed", and "Group owner changed" for node A. On A, learn B's address (192.168.0.2), type thi IP on A's edit text box, and then press the "Connect" button. This will open sockets between both nodes enabling them to exchange messages in a conversational fashion. Test this feature. On A, send a message to B. From B send a message to A.
4. Using the Genymotion connector
Genymotion is a Virtual Machine manager based on VirtualBox. It provides a similar functionality to AVD's, but performs much better and consumes less resources than AVD. To manage Genymode emulators in Termite, follows these steps:
1. Install Genymotion: First, you need to install VirtualBox. Then, download Genymotion and install it on your local machine.
2. Create virtual devices: Start Genymotion, and create a new virtual device from the image "Custom Phone - 5.0.0 - API 21 - 768x1280". Assign it a name, e.g. "TVD - 5.0.0 - API 21 - 768x1280". Change some of the virtual device's settings: set the memory to 512MB, and check "Use virtual keyboard for input". Then, create two clones of this virtual device image using the command line, as shown below. These clones will be the images of the emulators to be launched by Termite.
  $ VBoxManage clonevm "TVD - 5.0.0 - API 21 - 768x1280" --name "TVD - 5.0.0 - API 21 - 768x1280-Clone0" --register
  $ VBoxManage clonevm "TVD - 5.0.0 - API 21 - 768x1280" --name "TVD - 5.0.0 - API 21 - 768x1280-Clone1" --register
  $ VBoxManage list vms
Note: it is very important that the name of each clone follows the convention vdname-Clone#, otherwise, Termite won't be able to spawn emulators. The clone numbering # starts in 0.
3. Configure Termite: Update the backend "genymotion" in file etc/platform/[mac|linux|windows]/backends.conf. In particular, update the following attributes:
- "sdk": the full path to Android SDK
- "path": the full path to Genymotion
- "vmiprefix": the original name of the virtual device, in this case: "TVD - 5.0.0 - API 21 - 768x1280"
- "numclones": the number of available clones, in this case: 2
4. Update Termite's init script: Edit the configuration file Termite-Cli/etc/termite.conf, and set the attribute "init" to "simplechat-gm.termite", which corresponds to the name of a termite script located in Termite-Cli/etc/init.
5. Emulate the network: Restart Termite, and proceed as indicated by the steps 3-6 of Section 4.
5. Using the CloudStack connector
The CloudStack connector allows Termite to manage emulators on the CloudStack cluster of the RNL. Regardless of the platform where you execute Termite, there is a web interface through which you can manage your VMs on the CloudStack cluster. To access it, use the following URL, and replace the user and password information with the credentials that were sent to you by email. These credentials will also be necessary to set up termite.
url: http://borg.rnl.ist.utl.pt:8080/client/
user: XXX
pass: XXX
domain: CMOV
Next, we explain how to use Termite with the CloudStack cluster. Section 5.1 explains how to access the cluster from a Mac or Linux computer in which you have administrator privileges. Alternatively, if you have administrator privileges, but the computer runs Windows, you must execute Termite inside a guest Linux virtual machine (Section 5.2). If you don't have administrator privileges, namely in the labs' computers, you need to run the Termite Cli on a proxy server (Section 5.3).
5.1. Running Termite on your Mac / Linux computer
1. Install some necessary tools: Before you run Termite, you need to install the following software:
- Sshpass and Sshuttle. On Linux, you can install these tools using a typical package manager, such as apt. On Mac computers, we advise you to use the sshuttle version available from:
git clone https://github.com/jagheterfredrik/sshuttle
To install sshpass, you can use homebrew:
$ brew install https://raw.github.com/eugeneoden/homebrew/eca9de1/Library/Formula/sshpass.rb
$ sudo easy_install pip
$ sudo pip install requests pygments argcomplete prettytable
2. Configure Termite: Update the configuration file cloudmonkey-rnl.confbackends.conf with your CloudStack username and password. This file is located in etc/platform/[mac|linux|windows]/drivers/cloudstack. In file backends.conf of your target platform, make sure that the platform name referred in the path of attribute "cloudmonkey_config" is correct.
3. Update Termite's init script: Edit the configuration file Termite-Cli/etc/termite.conf, and set the attribute "init" to "simplechat-remote.termite".
4. Set up a VPN over SSH: This allows you to securely tunnel termite's local traffic to the RNL cluster through a proxy server running on borg. To set up the VPN, open a new terminal window, and execute the following command (assuming that sshuttle can be found in the PATH environment variable):
sudo sshuttle -r istXXX@borg.rnl.ist.utl.pt 192.168.79.0/24
Where istXXX is your IST ID. Sshuttle will request two passwords: your administrator password on the local machine (which is required to execute sshuttle), and your IST password (which is required to set up the tunnel on borg). Note that, if you run sshuttle multiple times within a short period of time, sudo will temporarily save your authentication information, and you will only have to provide your IST password.
5. Emulate the network: Restart Termite, and proceed as indicated in the steps 3-6 of Section 4. Note that sshuttle must be always running. Otherwise termite will not be able to communicate with the emulator instances.
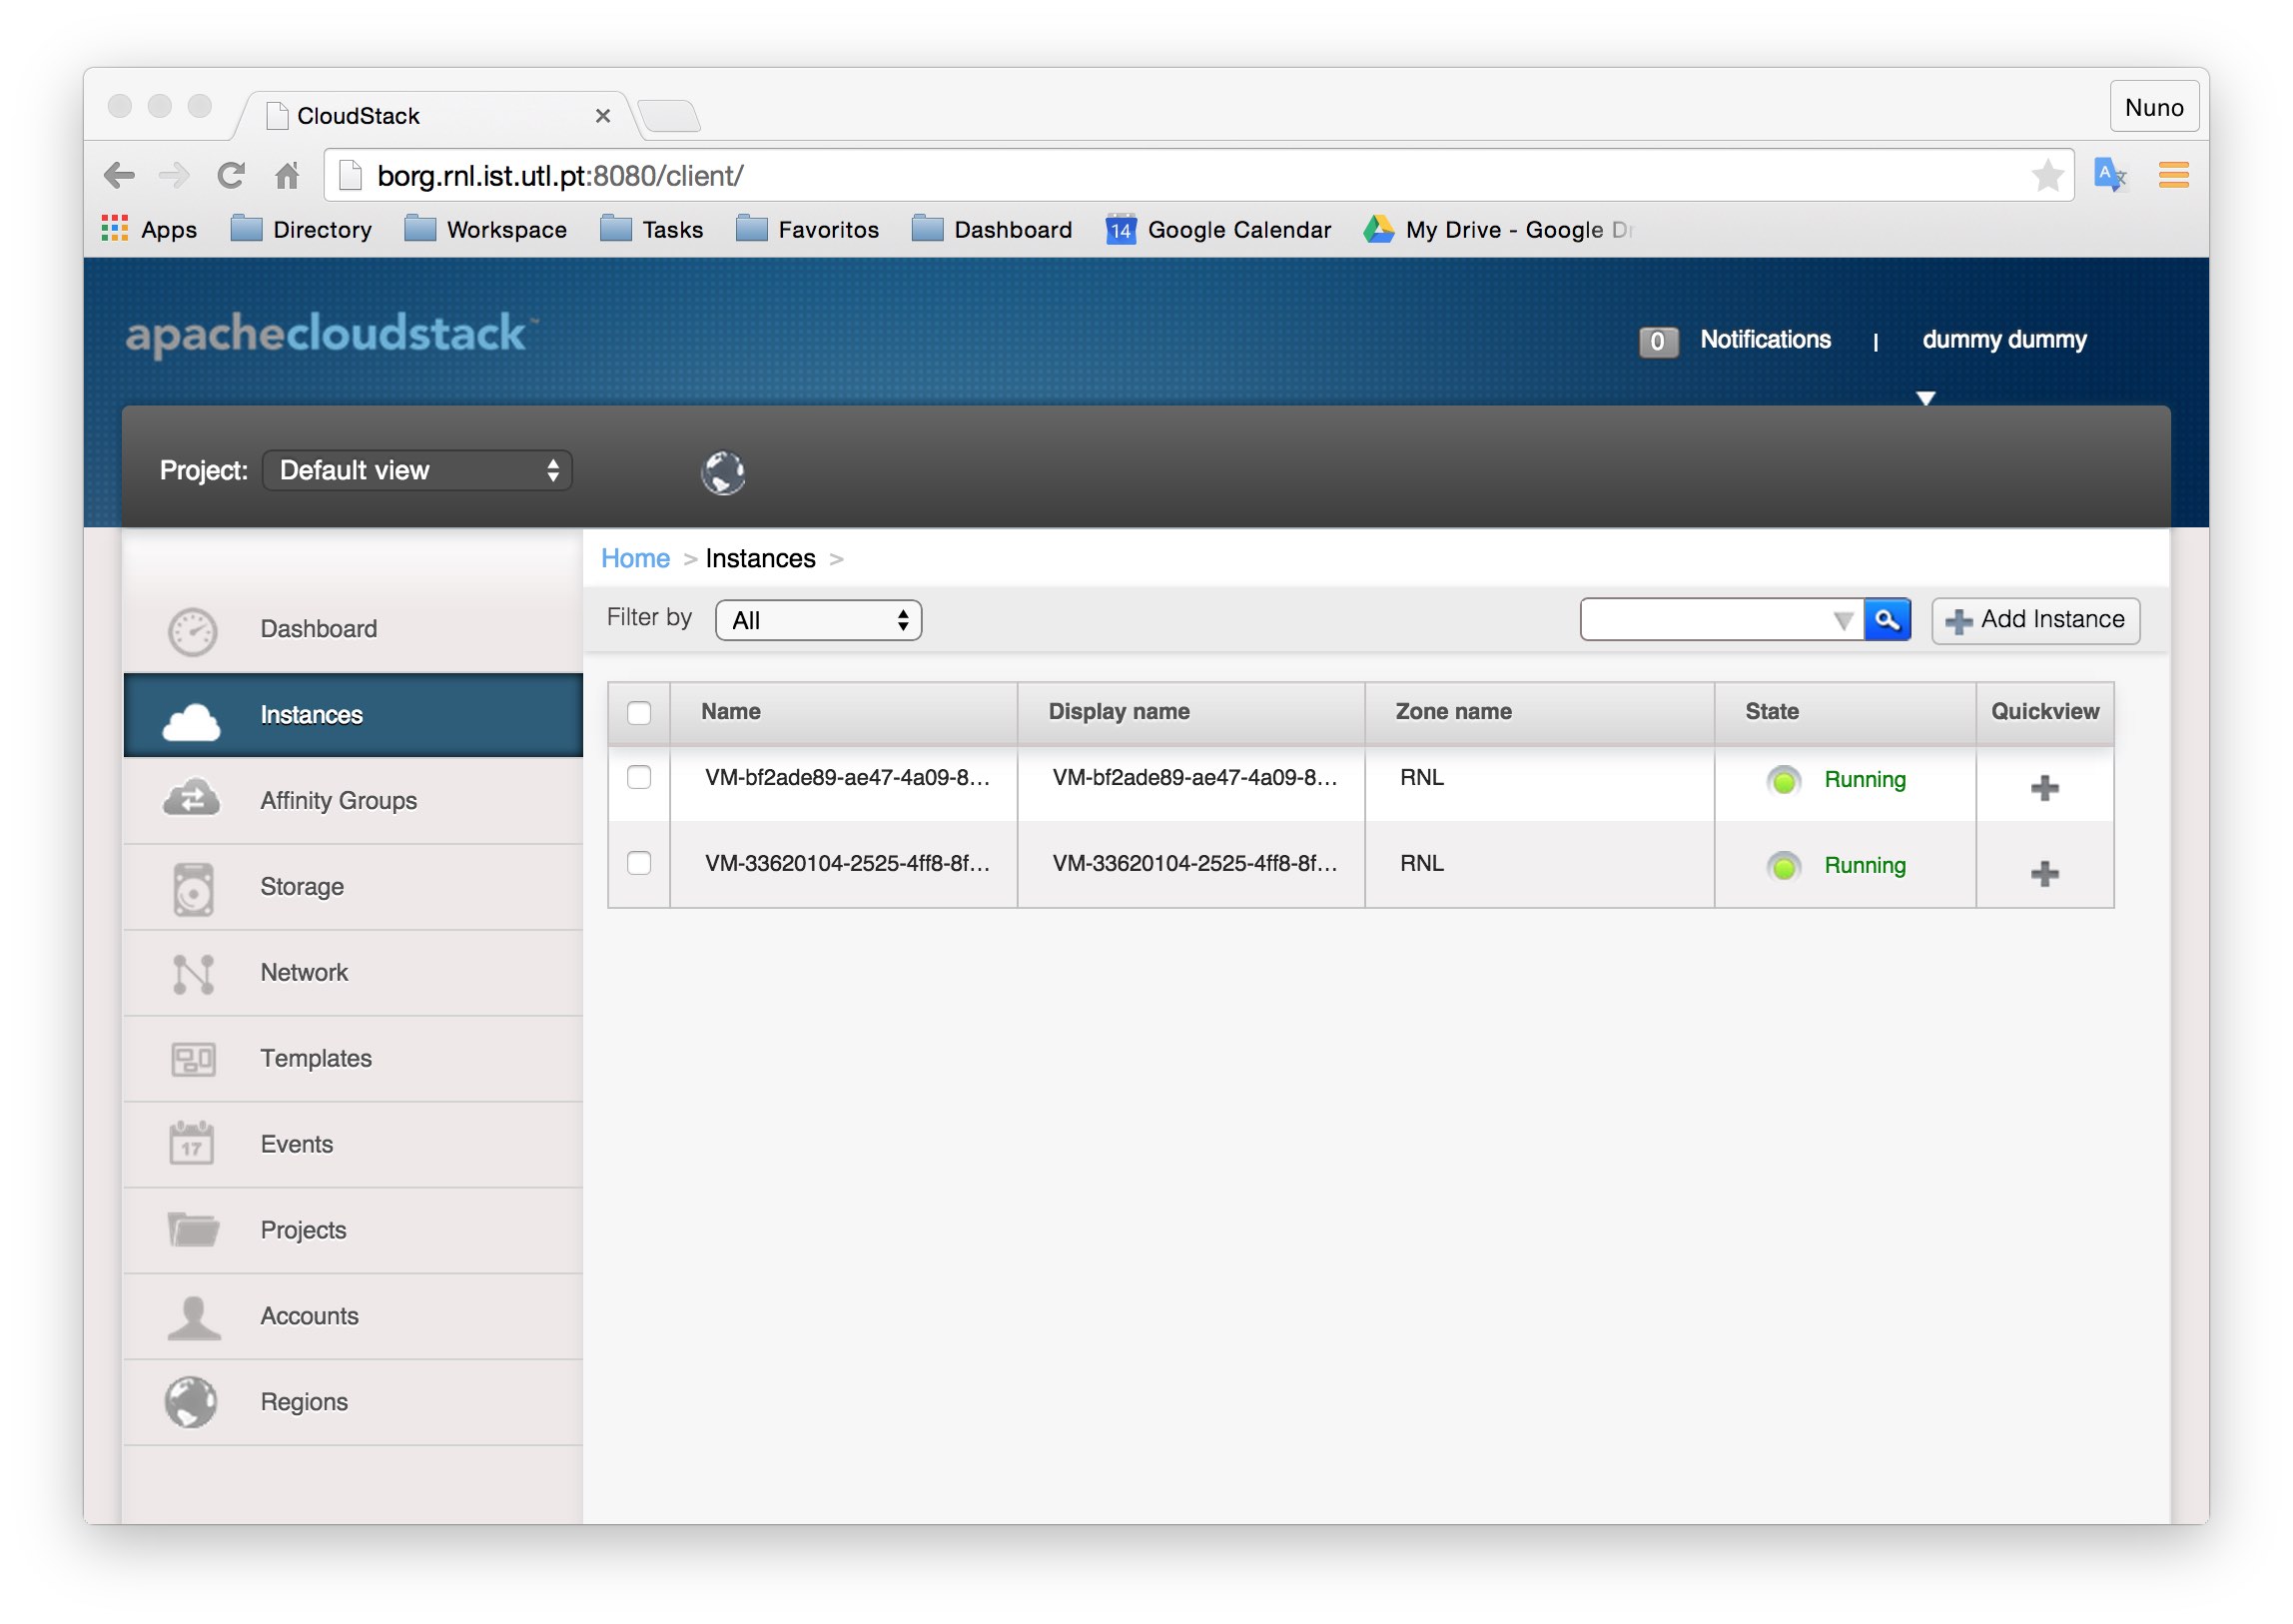
After deploying the emulators (in step 3), you can check their states on the CloudStack's Web interface, as show in the figure below. For each VM instance, click on its corresponding row of the list and press the icon "View console". This will open a remote screen to the each emulator, allowing you to interact with the application.
 |
5.2. Running Termite inside a guest VM on your Windows computer
If you have a Windows computer, sshuttle won't work. Therefore Termite won't be able to connect to the RNL cluster. To circumvent this limitation, one approach is to set up a Linux guest Virtual Machine, and run Termite on it as in a regular Linux computer (described in Section 5.1).
Here, we provide some general tips to set up the guest VM. First you need to install VirtualBox on your computer. Then, create a new VM image and apply a bridged network configuration. Install Ubuntu. Boot the VM and install the necessary software to run the Termite tool:
sudo apt-get install aptitude
sudo aptitude install git, python-pip, vim, openjdk-7-jdk
sudo aptitude install sshpass sshuttle
sudo pip install requests pygments argcomplete prettytable
sudo pip install --upgrade requests
Install gradle and Android Studio. Then, proceed as indicated in Section 5.1, steps >= 2.
5.3. Running Termite from the borg gateway
In the labs, you don't have administrator privileges on the computers. Therefore, the only way to run Termite is to execute this tool directly on borg. In order to do that, log into the borg server using your IST credentials, and proceed as indicated in Section 5.1.
Also note that you have to make some changes to the default Termite configuration. In particular, update the following attributes in the file etc/platform/linux/drivers/cloudstack/cloudmonkey-rnl.conf:
history_file = cloudmonkey-history
cache_file = cloudmonkey-cache
log_file = cloudmonkey-log
For security reasons, the RNL firewalls prevent the labs' computers from communicating with the CloudStack cluster. As a result, the SimpleChat package cannot be deployed to the emulators using the Android Studio installation of the lab workstations. To overcome this limitation, one approach is to ship the application package to borg, and from there use the Termite Cli to dispatch the package to the emulators. Shipping can be done by either placing the package on an AFS directory (which is accessible by both borg and the workstations) or uploading the package to borg over ssh.
6. General Advice
Termite supports scripts. For example, in directory Termite-Cli/scripts, files net2.termite and launch2.termite can automate the steps 4 and 5 of Section 3, respectively. To execute these scripts in Termite, execute the commands: l net2, and l launch2. You can create your own scripts too. Write the script file, assign it a name with .termite extension, e.g. x.termite, and place the file in directory scripts. To execute the script, issue l x (ignoring the extension).